
One of the best things to go along with purchasing a Nexus device is that the factory images are readily available no matter what.You don’t need to jump through any loopholes to find them. If you ever encounter an error, want to unroot, or return your device to stock, then all you have to do is flash the factory images on your device. This article will show you how to flash the factory images for the Nexus 6P.
Before we begin, make sure you back up any data you want to save from your internal storage. Everything will be erased.
**READ EVERY STEP CAREFULLY. I AM NOT RESPONSIBLE FOR ANYTHING THAT GOES WRONG**
Step 1: Download Minimal ADB and Fastboot
Minimal ADB and Fastboot is an excellent tool for flashing your Nexus device. There is no need to download the whole Android SDK. This tool was made by shimp208 over an XDA and it installs the latest version of ADB and Fastboot very easily and quickly. The size of the tool is only 2 MB.
The download is very quick and the install shouldn’t take more than a couple of minutes. Just follow the prompts,. accept the user agreement, and make sure you create a desktop shortcut. It makes things very easy and speeds things up. If you have any questions or problems, visit the thread over on XDA or ask me in the comment section below.
Click here to download Minimal ADB and Fastboot
Step 2: Download the Nexus 6P (angler) Factory Images
Like I stated earlier, this is the one of the best perks of owning a Nexus device. If you ever run into any boot loops or accidentally erase your internal storage, these factory images are always available. When you go to the Google page, make sure you scroll down to the Nexus 6P and select whichever version of Android you wish to flash.
The download size is nearly a gigabyte, so depending on your internet speeds it could take a little while. Google’s servers are usually pretty quick and it shouldn’t take more than 10 minutes at most to download.
Click here to download the Nexus 6P (angler) Factory Images
Step 3: Extract the Factory Images
When you download the file, it will be in a .tgz format, so you will need WinRar or 7zip to extract it. You can find WinRAR here or 7zip here depending on your operating system. I personally have WinRAR downloaded, but it is totally user preference.
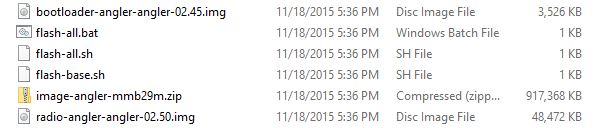
When you extract it the first time, it should show the following files:
Once these files are extracted, open a new file explorer and navigate to the location to where you installed Minimal ADB and Fastboot. If you left it at the default location, it should be under Local Disk > Program Files (x86) > Minimal ADB and Fastboot.
Drag all of the contents as seen above into the Minimal ADB and Fastboot (x86) folder. Once they are in there, just leave that window open as we will move on to the next step.
Step 4: Unlock the bootloader
To do this we will need to prep your device. If your bootloader is already unlocked, skip to Step 5. So go to your Settings > About phone, and tap your Build number 7 times. This will unlock Developer options if it isn’t already. Once in Developer options, make sure you check “Allow OEM unlocking”. This allows the bootloader to be unlocked. After you have done that, scroll down until you see USB debugging or Android debugging if you are on a custom ROM. Enable that as well.
Remember to back up anything on your internal storage that you want because unlocking/locking the bootloader will factory reset the device.
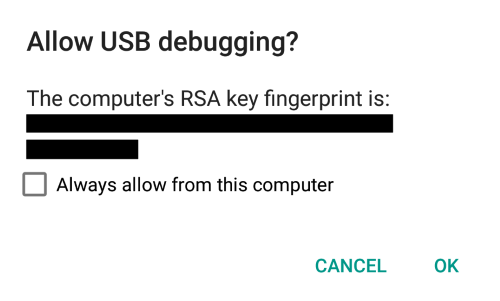
Once you have done all of the steps above, you are now ready to plug your Nexus 6P into your computer. You should see a prompt like the one below, make sure you check “Always allow from this computer.” Once that is done, we are ready to unlock the bootloader.
Now that the your Nexus 6P recognizes your computer, open up Minimal ADB and Fastboot by double clicking the shortcut on your desktop (or wherever you placed it). When it opens up, type the following command:
adb devices
This should show the device that you have attached. If it does not show anything, then your USB debugging is not setup properly. Unplug the device, plug it back in, and make sure you check “Always allow from this computer.” If this is command is run properly, you should see something like the following:

Now, your device should still be on its homescreen. Now enter the following commands to get to the bootloader screen:
adb reboot bootloader
fastboot devices
fastboot flashing unlock
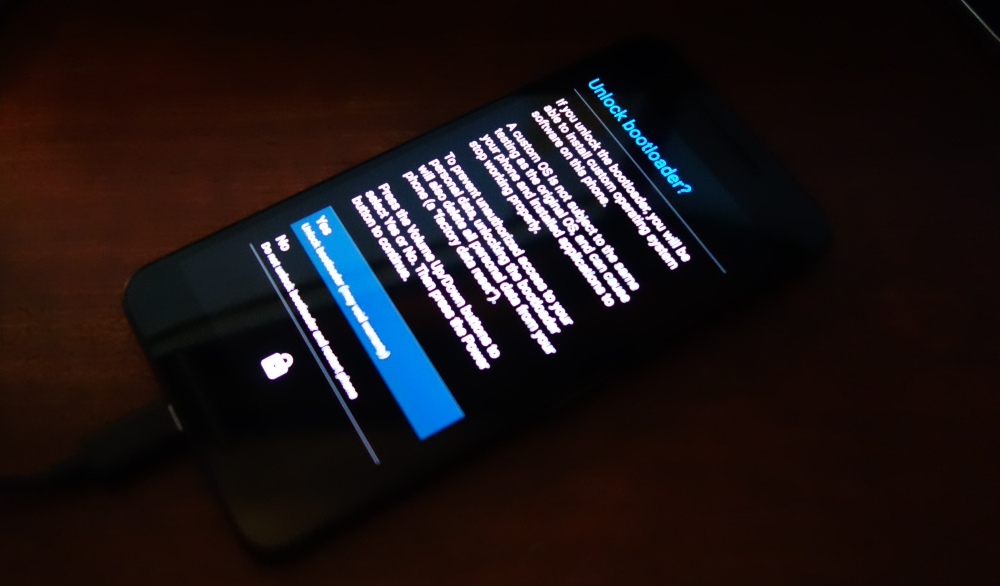
You will now see a new screen on your device, it wants you to confirm what you are doing. Use the volume keys to scroll and the power button to select. Press the power button button to confirm you want to unlock the bootloader.
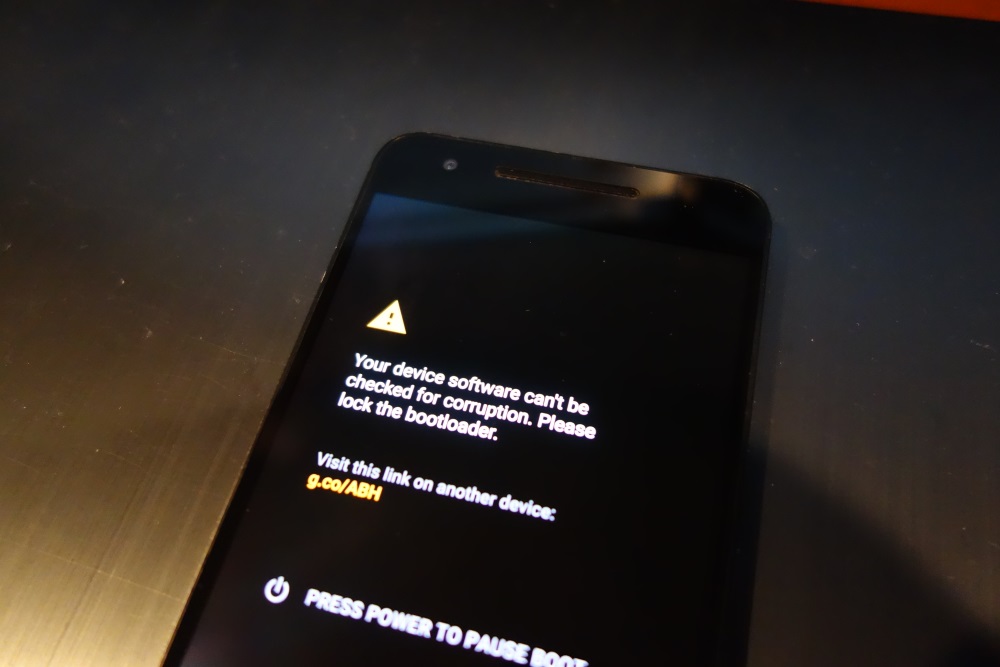
Once the phone reboots. you will also see a warning that states that the “device software can’t be checked for corruption. Please lock the bootloader.” Do not worry, that is normal.
Step 5: Flash the Factory Images (easiest way)
Now that the bootloader is unlocked, power off the device completely. Once the device is powered off, boot the device into the bootloader (power + volume down). Once you are in the bootloader, plug your Nexus 6P back into your computer and issue the following command to make sure your computer sees your device.
fastboot devices
Note: If the fastboot devices command does not work, then you will have to boot your phone through setup, skip all of the settings, and re-enable USB debugging like we did above.
Now we are ready to start flashing the Factory Images. We will start with the easy way first. This has worked every time for me on my Nexus 6P, so this is what we’ll do first. You should be able to use the batch file that flashes all of the images automatically, but sometimes it isn’t that easy. To be warned, this does wipe the device completely. Here is the command:
flash-all.bat
Once that is completed, let’s lock the bootloader to bring it completely back to stock. If the flash-all.bat command doesn’t work, jump down to Step: 5.1. Once the device reboots, make sure you are back in the bootloader and run this command:
fastboot flashing lock
You will be confronted with the same prompt as you were when you unlocked the bootloader, it just wants to confirm that you want to lock it. press yes.
Once that is all completed:
- Navigate to “Recovery” in your bootloader using the volume buttons and press power to select
- When a small dead Android appears, press Power + Volume Up (you may have to do it multiple times
- Select “Wipe data/factory reset
- Reboot
Step 5.1: Flash the Factory Images (longer way)
Sometimes the flash-all.bat command doesn’t always work, but there are ways around it, it just takes a little longer. To do this, navigate back to the Minimal ADB and Fastboot folder. You will now want to extract the image-angler-xxxxx.zip folder. Once that is extracted, make sure all of the files are together like below.
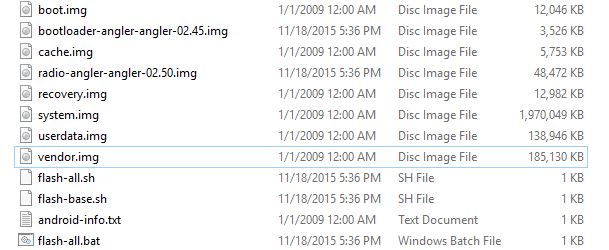
You will have to issue all of these commands in this order. Be patient or else you may miss something and you will have to redo it. If I were to go off the files above, I would need to type in bootloader-angler-angler-02.45.img. The easiest thing to do is type out the beginning of the file name, then press tab. It will auto select the file that follows that name. Be careful with the boot.img and bootloader.img though.
fastboot flash bootloader bootloader.img
fastboot reboot-bootloader
fastboot flash radio radio.img
fastboot reboot-bootloader
fastboot flash vendor vendor.img
fastboot reboot-bootloader
fastboot flash system system.img
fastboot flash boot boot.img
fastboot flash recovery recovery.img
fastboot erase cache
fastboot flash cache cache.img
Once that is completed, let’s lock the bootloader to bring it completely back to stock. If the flash-all.bat command doesn’t work, jump up to Step: 5.1. Once the device reboots, make sure you are back in the bootloader and run this command:
fastboot flashing lock
You will be confronted with the same prompt as you were when you unlocked the bootloader, it just wants to confirm that you want to lock it. press yes.
Once that is all completed:
- Navigate to “Recovery” in your bootloader using the volume buttons and press power to select
- When a small dead Android appears, press Power + Volume Up (you may have to do it multiple times
- Select “Wipe data/factory reset
- Reboot
Your phone should now be completely stock! If you have any issues, feel free to comment below, find me on Twitter @PhoneProbe, or email [email protected].