
The Nexus series of phones is something I always wanted. It started out as wanting to get prompt updates and a nice clean stock Android experience, but it soon turned into something way more than that. When I picked up my Nexus 6, it was missing some very basic features: tap-to-wake and a notification light. Once it was known that the device was capable of employing those features, they just weren’t enabled by default, I knew I had to root my Nexus 6.
I had previous experience with rooting and installing custom ROMs, but the amount of options that are available for the Nexus 6 was mind-blowing. Knowing what I know now, when I picked up my Nexus 6P, I waited patiently for the developer community to pick up on XDA and it didn’t take long. I knew what my device was capable of, I just needed to “unlock” that power.
Just to give a warning, rooting your Nexus 6P isn’t for everyone. It takes some time and some reading, so make sure you understand all that comes along with the process. If you don’t follow instructions carefully, you could end up with a soft-bricked device, or even worse, a totally bricked Nexus 6P that is unusable. I’ll try to link as many resources as I can to make this as easy as possible for everyone.
Here are a few ways to obtain root on your Nexus 6P without installing a custom ROM or recovery:
- Lx Multi Tool
- [GUIDE] Unlock/Root/Flash for Nexus 6P (my personal favorite)
- How to root the Nexus 6P and install TWRP recovery (XDA TV)
Note: If you plan on using the command line method, I recommend familiarizing yourself with Minimal ADB and Fastboot. It saves a lot of time instead of installing and setting up the full Android SDK. On the page it includes detailed instructions. If you have any trouble or any questions, please feel free to email me at [email protected]. I am not responsible if you destroy device; read carefully!
QFuse does not blow
One of the biggest concerns about the Nexus 6P when it came out was the implementation of the QFuse. The QFuse is something that was implemented by Qualcomm and would be expected to blow when unlocking the bootloader. Once this hardware fuse is blown, there is no turning it back. If that was keeping you from rooting your 6P, there is good news for you.
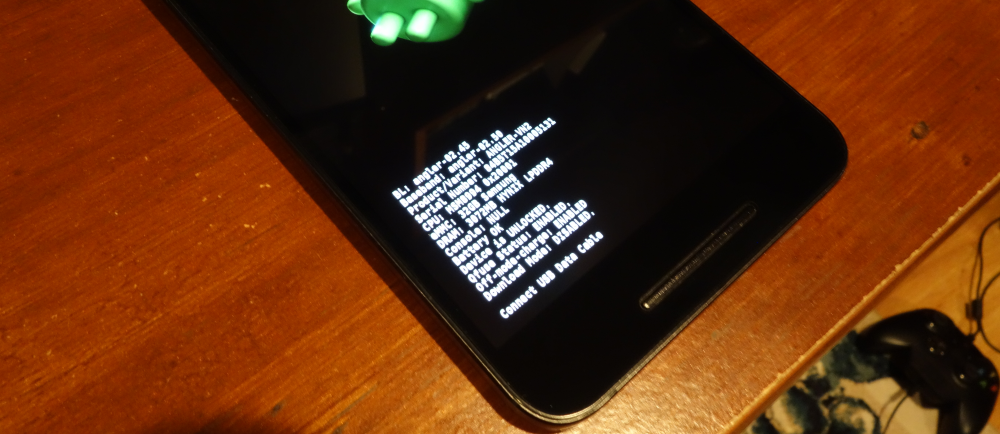
Many, including myself were very confused by this. The Nexus lineup are the go-to devices for developers, so how could Google do such a thing? Well we don’t have to worry about that, because they didn’t. The QFuse on my Nexus 6P and many others still reads as “enabled”. That is because it doesn’t blow when the device is unlocked or other customized software is installed.
Just like before, all you have to do is flash the factory images to make the device return 100% stock. No one will be the wiser, not even Google. That means if you have to RMA your phone, you will not have to worry about the QFuse.
Chainfire’s Systemless root
If you haven’t heard of Chainfire and you are reading this article, you may be in the wrong place. He is one of the most well-known Android developers and creator of SuperSu and his CF-Auto-Root method supports tons and tons of devices. Without Chainfire, Android development might be in a very different place.
One of the issues of the old root method was that it modified the system partition on Android devices and it was much harder to unroot. Recently, Chainfire introduced the systemless root method and it has a plethora of benefits. One of the biggest features of the systemless root is that a factory reset will remove root completely,The other features can be seen below, courtesy of XDA:
- A cleaner approach and design
- Easier unroot
- An unlittered /system partition
- Excludes things like “sugote”, which are not needed on Android 6.0 Marshmallow
- OTA’s are slightly easier now, as reflashing boot image is usually a lesser hassle than reflashing an entire /system.
- Most importantly, this does not soft brick your device if you do not have the correct kernel installation. Previous methods to root Android 6.0 required a SELinux policy patch in the kernel, without which, the device would not boot. With this method, if the supporting kernel is absent, you won’t have root but the device will boot.
You can view the official thread here, as well as the available downloads. If you are looking for the flashable zips for use in recovery, you can find those here. Just keep in mind that although it does have a ton of benefits, it is still experimental. I have seen no ill-effects from using it, but there always is the chance for some bugs.
Android Pay Works (for now)
Long story short, Android Pay is not supposed to work with root. The reasoning lies within the fact that Google can’t verify that your information hasn’t been compromised because of the way Android Pay is structured. Google Wallet was able to verify within the app if everything is OK, but with the big banks involved, it had to be different.
Even though Android Pay isn’t supposed to work with root privileges and an unlocked bootloader, there are a few cases that allow it. When there’s a will there’s a way, right? Not really. According to Chainfire, his systemless root wasn’t even expected to work with Android Pay, it was just a fluke and he expects it to be patched in the future. That doesn’t stop us now though.
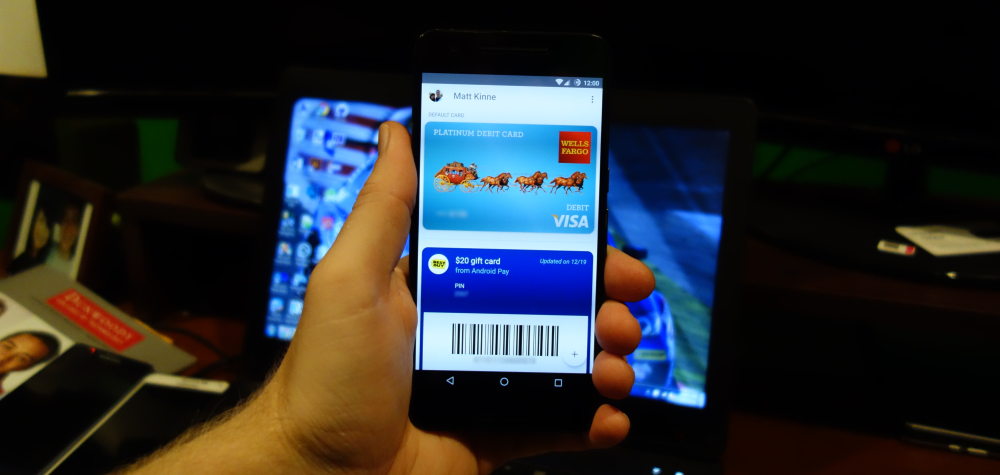
First of all there are only a few systemless root versions that work. For me, it is only version 2.61, but others have gotten it to work with other versions combined with root cloak and so on. For instance, both Chroma and more recently Pure Nexus are compatible with Android Pay, but there are a few catches. You need to go in this order:
- Flash the ROM in recovery (TWRP is preferred)
- Flash BaNkS Gapps package as it’s the only one that’s compatible
- Flash unSU.zip file to remove SuperSu completely
- Flash SuperSu systemless v2.61
Like Chainfire said, it isn’t supposed to work, but it does, so we’ll see how long it lasts. In the meantime, I enjoy running a custom ROM, kernel, root privileges, as well as being able to use Android Pay, so it’s a win, win, win! Remember if Android Pay is that big of deal breaker, you can always go back to the factory images and have Android Pay work flawlessly. I have done it three or four times now.
Multi-window
One of the nice features of large devices is all that screen real-estate. One of the big problems is that with stock Android, there hasn’t been a way to use two apps side-by-side. Samsung was one of the big pioneers of the multi-window feature and it seems Google finally took notice.
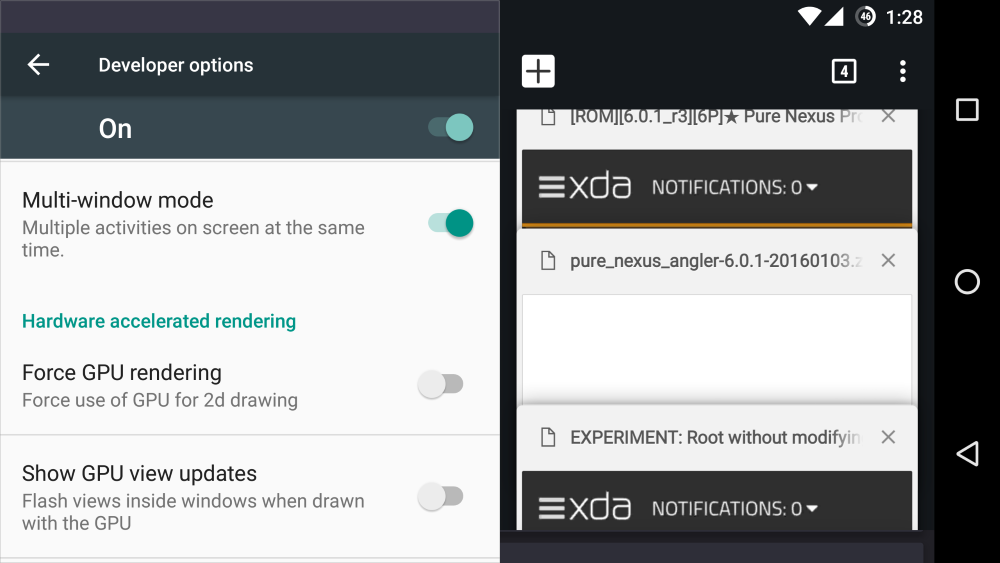
When the first Android M Developer Preview was released, it was discovered that it supported multi-window natively, it just wasn’t enabled by default. The fact that it was there means that it would be used in the future, but it didn’t make it to the final cut of Marshmallow. Even though it isn’t official, it is still hidden within the build.prop.
There are two ways to enable this feature: one is to have a custom ROM that enables such as Pure Nexus or go into your devices build.prop and enable it manually. Thankfully Quinny899 wrote up this nice guide on how to do so using Minimal ADB and Fastboot.
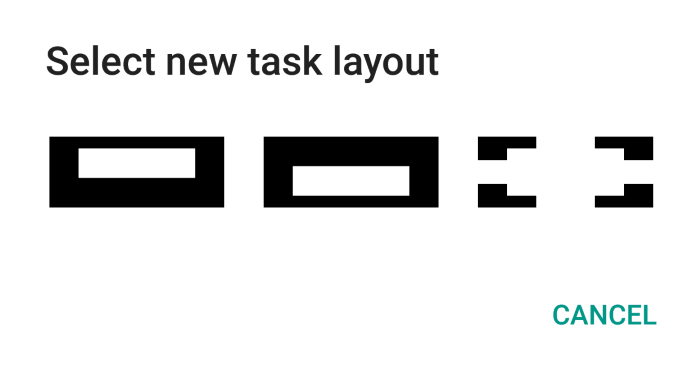
Now keep in mind it still is experimental, there is a reason why it wasn’t in the official Marshmallow release, but I find it pretty useful. It gives you a few options on how you want your apps to display as you can see above. The far left option puts the app you selected at the top whereas the middle one puts the app you selected at the bottom. The far right option just opens the app in full screen like normal. One thing to note is that the recent app drawer stutters momentarily when opened and multi-window is enabled.
Custom ROMS/Kernels
On Android Marshmallow, Google added a few helpful features such as battery percentage inside the icon, changeable quick settings, removable icons in the status bar, and native support for RRO layers (with root), but it still isn’t as customizable as a ROM. The things that ROMs offer vary from developer to developer, but they can bring features such as modifying the lockscreen, navigation bar, native DPI changing, and even multi-window viewing. To top it off, custom ROMs usually start using the latest AOSP build as soon as Google releases them. This means you can still get prompt updates along with the customization that stock Android leaves out.
Like I stated earlier, the XDA Forums are full of great development for the Nexus 6P, espcecially ROMs. Other users are always offering up their experiences and even their troubleshooting skills; it really is an awesome community. ROMs bring along with them the user interface changes that you wish you could do on stock Android.
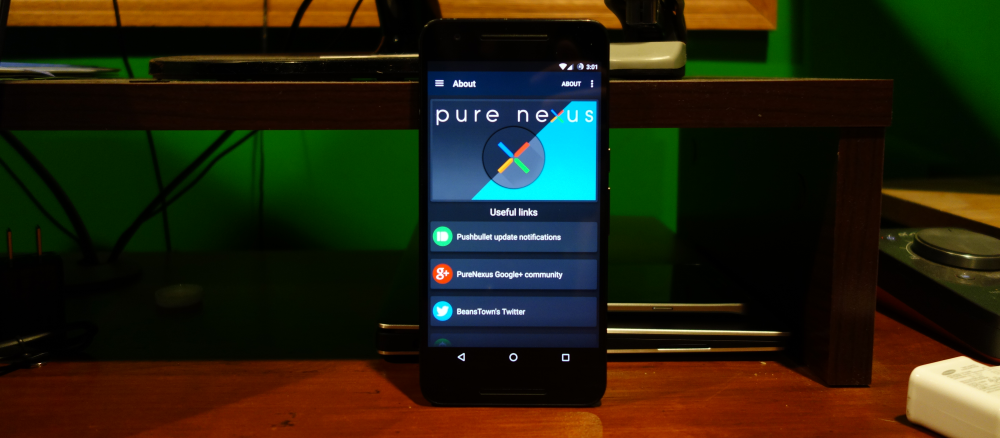
A few of the ROMs I have used on my Nexus 6P are:
As far as kernels go, they give the user a little more power when it comes to their Nexus 6P. Everything is on the table from under-clocking/over-clocking the CPU, custom voltage support, custom haptic feedback settings, tap-to-wake, etc. Long story short, they are a really good way for you to maximize the device to your choosing. I just recently started tinkering with the interactive governor settings with ElementalX thanks to this thread: [GUIDE] Advanced Interactive Governor Tweaks; Buttery smooth and insane battery life!
Both frano.Kernel and ElementalX are awesome kernels and have great apps to go along with them. They use Material Design and are both very easy to navigate. To top that off, flar2 of ElementalX and franciscofranco of franco.Kernel are very active in their threads to help improve their development and assist others.. There are both free and paid versions of each app, but like I stated in the beginning, I HIGHLY RECOMMEND SUPPORTING DEVELOPERS! Without them and their donated time, our devices would be much less customizable.
A few of the kernels I have used on my Nexus 6P are:
- Stock Linux
- franco.Kernel
- ElementalX
- CyanogenMod
Conclusion
Many people, including myself, think that the Nexus 6P is the phone of the year, even without all of the extra development that is available. To get the most out of your 6P, you should definitely give rooting a shot. You can do many things from installing custom ROMs, kernels, applications, and even extending your battery life by hours. I have never once regretted rooting any of my phones. The great thing about Nexus devices is that if you ever want to go back to being stock, all you have to do is flash the factory images.
Like I stated earlier, do all of these modifications at your own risk! I am not responsible with what you do to your device nor is Phone Probe. Make sure you do your research before attempting anything and know what you’re getting yourself into. If you have any questions, feel free to email me ([email protected]) or even leave a comment below! I’ll be sure to keep up with this post.
If you enjoy any of these ROMs, Kernels, Apps, etc., please make sure to support the developers! Development takes time and a lot of these developers do this in their free time. The same goes for apps; please don’t Google the APK file, if you enjoy it, purchase it! It keeps Android development going. It’s what makes our community better than iOS!!!